I’m proud to present you an amazing component for PowerApps from my talented brother Martin Lehmann!
Gone are the days of struggling with third-party tools or Power Automate to add notes or drawings to existing images. Martin’s component makes it all simple. You can easily overlay multiple images, make notes, and save the final image all in one place.
🎯 What Makes This Special?
The best part? The interface is super user-friendly, making it a breeze to add annotations to your images with no premium connectors or third-party tools needed.
💡 Problem Solved
Traditionally, merging images or adding annotations in PowerApps required:
- Complex Power Automate flows
- Premium connectors
- Third-party services
- Custom code components
This solution eliminates all those dependencies!
✨ Key Features
- Pure PowerApps Solution: No external dependencies
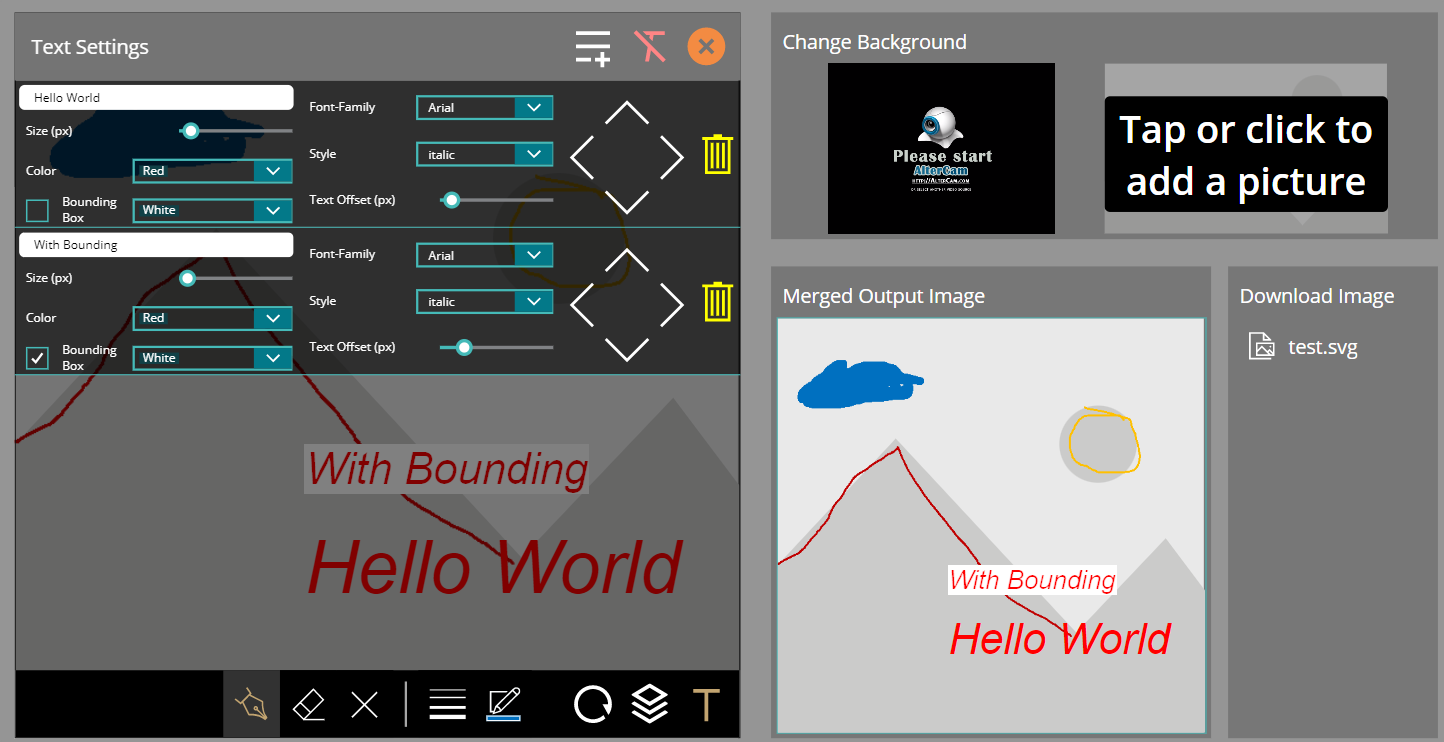
- Image Overlay: Combine multiple images seamlessly
- Annotation Tools: Add notes and drawings directly
- User-Friendly Interface: Intuitive design for easy use
- Save & Export: Generate final merged images
- SVG-Based: Scalable vector graphics for quality output
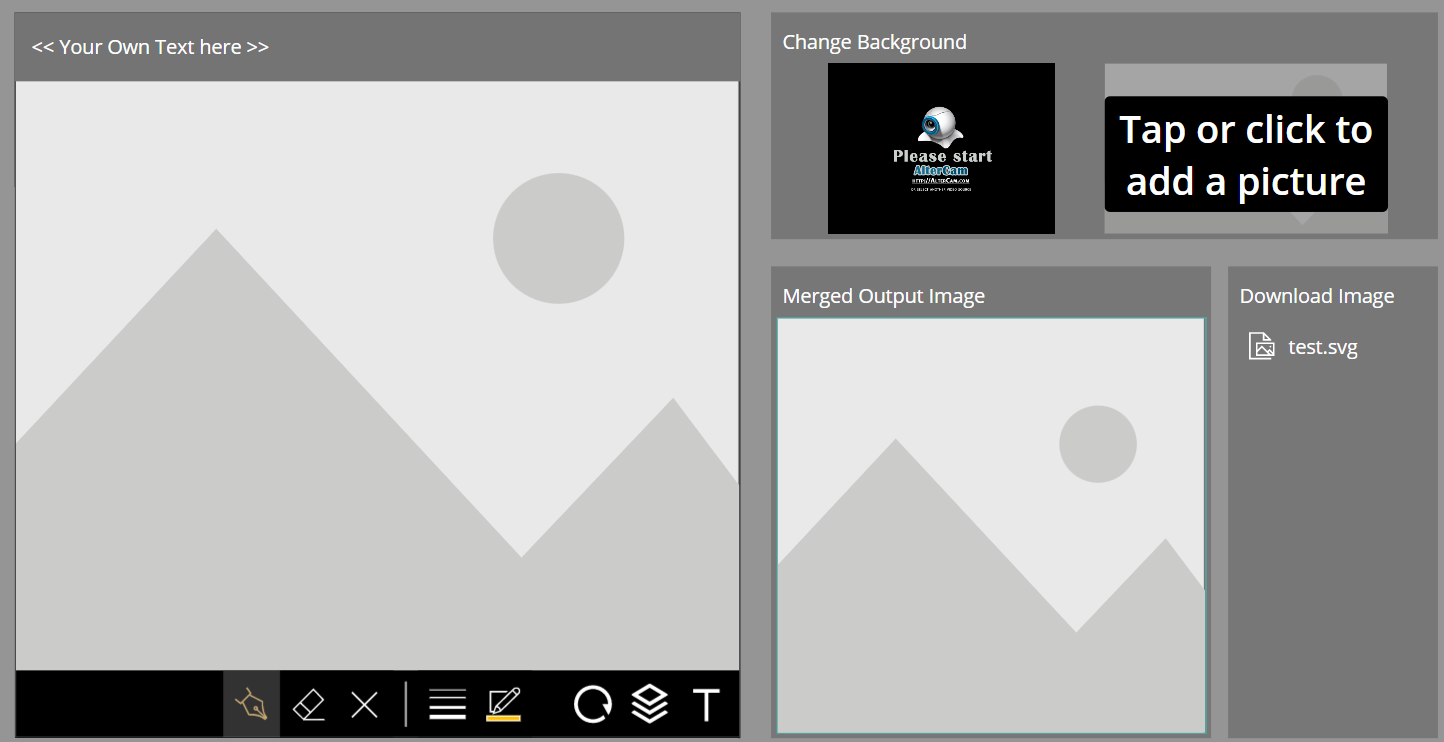
🛠️ How It Works
The component leverages SVG capabilities within PowerApps to:
- Load base images into the canvas
- Layer additional elements (text, drawings, shapes)
- Combine everything into a single image
- Export the result as a usable image file
🚀 Getting Started
Download & Implementation
📥 Get the Component from GitHub
The repository includes:
- Complete PowerApps component
- Implementation guide
- Example screenshots
- Usage documentation
Quick Setup
- Download the component from GitHub
- Import into your PowerApps environment
- Configure your image sources
- Start merging images immediately!
🎨 Use Cases
This component is perfect for:
- Field Service Apps: Annotate photos with notes and arrows
- Inspection Reports: Mark up images with findings
- Training Materials: Create instructional overlays
- Documentation: Combine screenshots with explanations
- Quality Control: Highlight issues on product images
🆠Benefits Over Traditional Methods
| Traditional Approach | This Component |
|---|---|
| Requires Power Automate | Pure PowerApps |
| Premium connectors needed | No premium required |
| Third-party dependencies | Self-contained |
| Complex setup | Simple implementation |
| Limited offline capability | Works offline |
📱 Mobile-Friendly
The component works seamlessly on:
- Desktop browsers
- Mobile devices (iOS/Android)
- Tablet interfaces
- PowerApps Mobile app
🔄 Comparison: Before vs After
The visual comparison shows the dramatic improvement in capability and user experience.
ðŸ› ï¸ Technical Implementation
The component uses:
- SVG manipulation for image layering
- Canvas drawing for annotations
- Base64 encoding for image handling
- PowerApps formulas for logic
- No external APIs or services
📚 Additional Resources
- GitHub Repository: Complete source and documentation
- Martin’s LinkedIn: Connect with the creator
- Screenshots: Available in the GitHub repository
🎯 Key Takeaways
- No premium required: Save on licensing costs
- Pure PowerApps: No external dependencies
- User-friendly: Easy to implement and use
- Versatile: Multiple use cases across industries
- Mobile-ready: Works on all PowerApps platforms
- Community-driven: Open source and free to use
🔮 Future Enhancements
Potential improvements could include:
- Additional annotation tools (shapes, arrows, highlights)
- Template system for common overlay patterns
- Batch processing capabilities
- Integration examples with SharePoint and Teams
This innovative component demonstrates how creative PowerApps development can eliminate the need for complex flows and premium connectors while delivering powerful functionality.
Thanks to Martin Lehmann for creating and sharing this valuable community resource! 🙌
This article was originally published on Marcel Lehmann’s blog and has been migrated to PowerPlatformTip for better accessibility and searchability.