#PowerPlatformTip 58: 'HTTP Actions'
TL;DR: The built-in HTTP action calls any REST API, but it is premium. For Microsoft 365 data you often don’t need it: SharePoint, Office 365 Outlook, Office 365 Users, Office 365 Groups and Microsoft Teams each have a standard “Send an HTTP request” action that calls their API with your existing connection. Pick the standard one when it covers your endpoint, the premium HTTP action for everything else.
When a connector has no action for what you need, an HTTP request usually does. The question is which one, because Power Automate has several, and only some of them are included in a standard license.
💡 Challenge
You need an API call that no ready-made action covers: a SharePoint REST endpoint, a Microsoft Graph property, or a third-party service. Searching for “HTTP” in the designer shows a long list of actions, some standard, some premium, and it isn’t obvious which one fits.
✅ Solution
Choose the HTTP action by target:
| Action | Connector | Calls | License |
|---|---|---|---|
| Send an HTTP request to SharePoint | SharePoint | Any SharePoint REST API you have access to | Standard |
| Send an HTTP request | Office 365 Outlook | Graph: /me or /users/<id> with messages, mailFolders, events, calendar(s) | Standard |
| Send an HTTP request | Office 365 Users | Graph: /me or /users/<id> with e.g. drive, planner, photo, contacts, licenseDetails | Standard |
| Send an HTTP request V2 | Office 365 Groups | Graph: /groups | Standard |
| Send a Microsoft Graph HTTP request | Microsoft Teams | Graph: /teams, /me, /users with channels, chats, messages, onlineMeetings | Standard |
| HTTP | Built-in | Any URL | Premium |
| HTTP Webhook | Built-in | Subscribe and wait for a callback | Premium |
| When an HTTP request is received / Response | Built-in (Request) | Expose the flow as an endpoint and answer it | Premium |
| Invoke an HTTP request | HTTP with Microsoft Entra ID (preauthorized) | Microsoft APIs with your Entra ID sign-in | Premium |
The standard actions use the connection you already have, so there is no authentication to configure. They only accept the segments listed for their connector.
🔧 How It’s Done
1. Try the standard action first.
🔸 Example: read the licenses of a user with Office 365 Users Send an HTTP request: URI https://graph.microsoft.com/v1.0/users/<userId>/licenseDetails, Method GET. A segment outside the list, such as /manager, isn’t supported; for that the connector has its own action Get manager (V2).
🔸 Example: read list items with Send an HTTP request to SharePoint: Site Address = your site, Method GET, Uri _api/web/lists/getbytitle('Orders')/items?$select=Id,Title&$top=50.
2. Use the premium HTTP action for any other API.
🔸 Add HTTP, select the Method (GET, POST, PUT, PATCH, DELETE) and enter URI, Headers and Body.
🔸 Under Authentication choose what the API expects: None, Basic, Client Certificate, Active Directory OAuth (Microsoft Entra ID app registration) or Raw.
🔸 Store secrets in environment variables or Azure Key Vault instead of typing them into the action, and turn on Secure inputs in the action settings.
3. Handle the response.
🔸 Read single values directly, for example body('HTTP')?['name'], or add Parse JSON with a schema generated from a sample response.
🔸 Check the status code with a condition on outputs('HTTP')?['statusCode'] before you process the body.
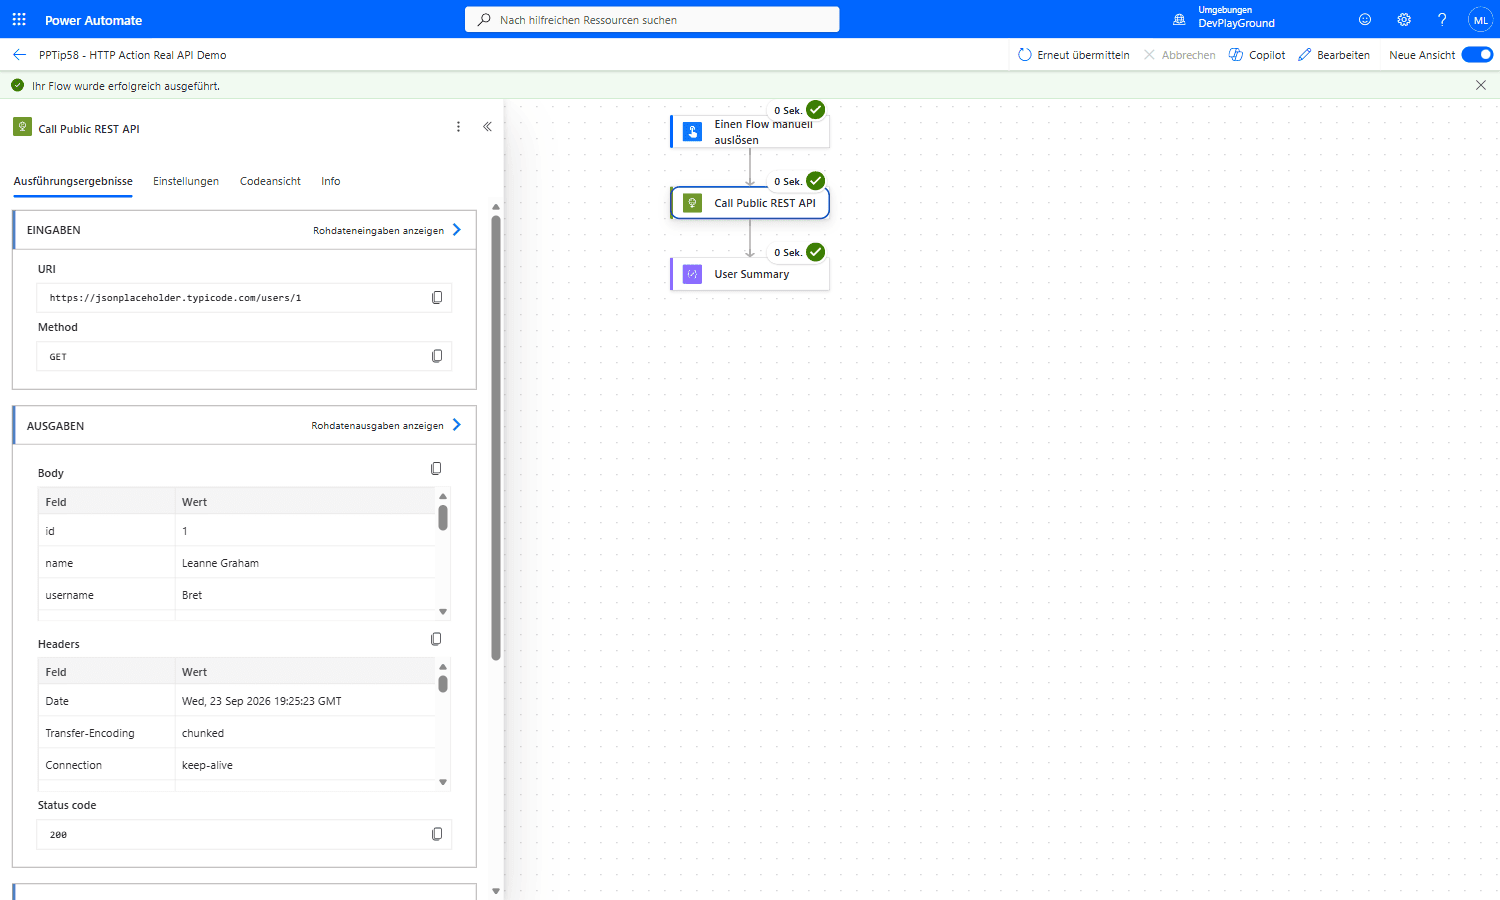 Real flow run: a plain
 GET to https://jsonplaceholder.typicode.com/users/1 with the built-in HTTP action, no auth, returns real JSON (id, name: "Leanne Graham", username: "Bret") with Status code 200.
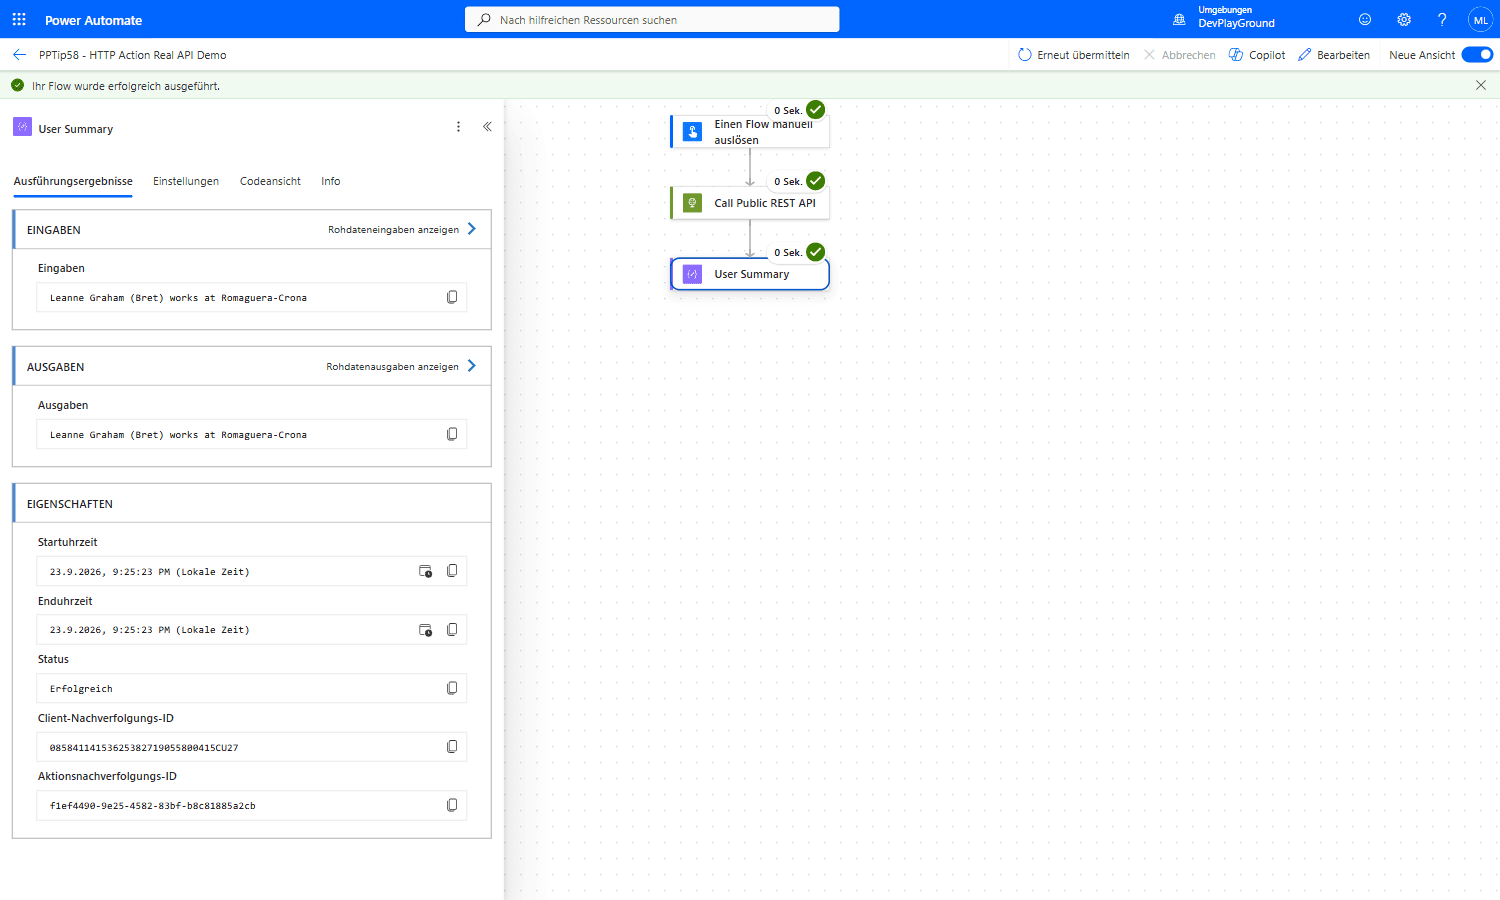 Real flow run:
 concat(body('Call_Public_REST_API')?['name'], ' (', ...?['username'], ') works at ', ...?['company']?['name']) turns the raw response into “Leanne Graham (Bret) works at Romaguera-Crona”.
🎉 Result
You reach any REST endpoint from your flow, and for Microsoft 365 data you do it with standard actions and existing connections, without a premium license.
🌟 Key Advantages
🔸 Beyond the connector actions: every endpoint of SharePoint, Graph or a third-party API.
🔸 Standard where possible: SharePoint, Office 365 Outlook, Office 365 Users, Office 365 Groups and Microsoft Teams offer HTTP actions in a standard license.
🔸 Full control: method, headers, body and authentication in the premium HTTP action.
🛠️ FAQ
1. How do I authenticate the HTTP action with Microsoft Entra ID?
Set Authentication to Active Directory OAuth and enter Tenant, Audience, Client ID and the secret of your app registration. Without an app registration, use the premium connector HTTP with Microsoft Entra ID (preauthorized), which signs in with your account.
2. What’s the difference between standard and premium HTTP actions?
The standard ones belong to a Microsoft 365 connector and only call that service’s API with your connection. The built-in HTTP, HTTP Webhook and Request actions, and HTTP with Microsoft Entra ID, are premium and need a Power Automate Premium (or comparable) license.
3. Can I trigger a flow via an incoming HTTP request?
Yes. Use the When an HTTP request is received trigger to expose an endpoint that starts your flow, and the Response action to answer the caller. Both are premium.
🔗 Related Tips
🔸 #PowerPlatformTip 138: ‘Graph API via HTTP with Microsoft Entra ID’ - call Microsoft Graph through a preauthorized connector, no app registration needed.
🔸 #PowerPlatformTip 162: ‘Create a Private Teams Channel from a Flow’ - a concrete example of reaching past a standard connector’s limits with a raw Graph HTTP call.
🔸 #PowerPlatformTip 98: ‘Secure Inputs / Secure Outputs’ - hide tokens and secrets of your HTTP calls in the run history.
This tip is by Marcel Lehmann, Microsoft MVP (Business Applications) and founder of the Power Platform Academy – live Power Platform workshops, free or CHF 49. Join the workshop waitlist to get notified about new dates. For companies that want this implemented for them, see KMUpower – Power Platform consulting & automation for SMEs (DACH).